Archive | Organizational tips RSS feed for this section

Conquering Clutter: Guidelines to Follow & Questions to Ask When Decluttering

purging clutter tips // shoe closet
This week I’m taking time to declutter. We all have sentimental items that we cherish and want to store away, but when is it too much? And when is it clutter? Clutter is basically anything that takes up space and isn’t improving or making your life better.  If you have clothing in your closet that you haven’t worn in years, piles of mail on the counter, toys in every corner or trouble finding important documents, it is time for you to think about purging and decluttering your home. For many of my clients letting go of items is the biggest hurdle when organizing their home.
organizing art supplies in jars ideas
Here are some guidelines and questions you should ask when determining whether to toss/recycle, donate to charity or keep:
SORT
Take one item at a time when determining to keep it or not. While sorting keep in mind that the goal is to purge and reduce the amount of stuff in your home. The best decisions are the ones made quickly.
shoe and jewelry organization idea
QUESTION
If you get stuck and can’t decide what to do wit h a particular item, ask yourself clarifying questions including:
  • When is the last time you used this item and was it in the last year?
  • Is it broken, damaged or the wrong size?
  • Does it make you happy or have sentimental value?
  • Do you really need this item?
purging clutter tips // bathroom shelf organization
REVIEW
For many of us holding onto clutter is emotional. Our possessions reflect who we are, who we are not and who we wish to be. Emotional attachment to items is something most of us do and the primary reason people hold onto clutter. Pretty Neat suggests that if you can’t make a decision on whether or not to get rid of an item, put it in a review box for a specified period of time. When time is up, it should be easier to make the decision. I would recommend having a limit to how many items can go into the “review box.” It should only be used on very select items and as sparingly as possible. Again the goal is to reduce the clutter in your home and make it more functional and beautiful.
organized vanity
TOSS & RECYCLE
Much of the clutter in your home could actually be trash. Here are some items that are the most obvious to throw away and recycle whenever possible:
  • Junk mail, old magazines and newspapers.
  • Expired food, make-up and medicine. Check with your local recycling center on how and where to dispose of medications safely. If in California,CALRecycle has list of where to take sharps and medications.
  • Clothing that is damage, stained or ripped beyond repair .
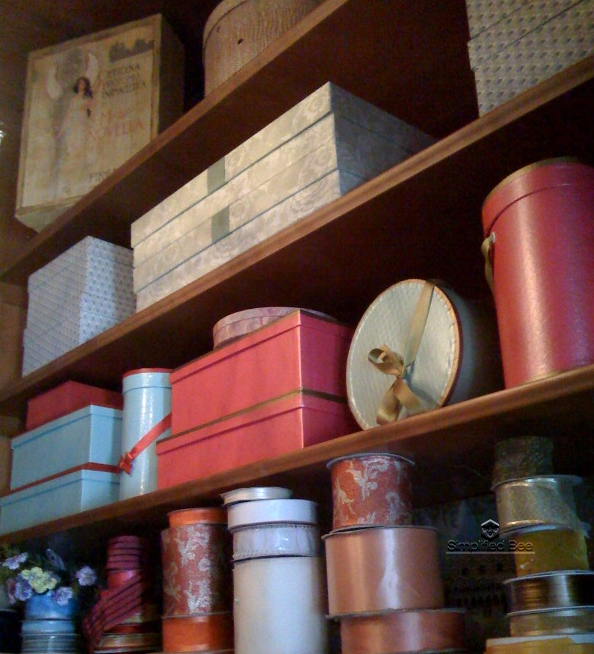
  • Boxes that are damaged or no longer useful.
  • Broken toys, games and electronic equipment.
beautiful walk-in closet // Lonny
DONATE
An easy way to declutter your home is to donate items you don’t use, but are still in good condition. Donating to a family, friends or a local charity is a great place for used clothing, furniture, CDs/DVDs, toys, tools and so much more.
out of clutter, find simplicity - Albert Einstein #quote
SCHEDULE
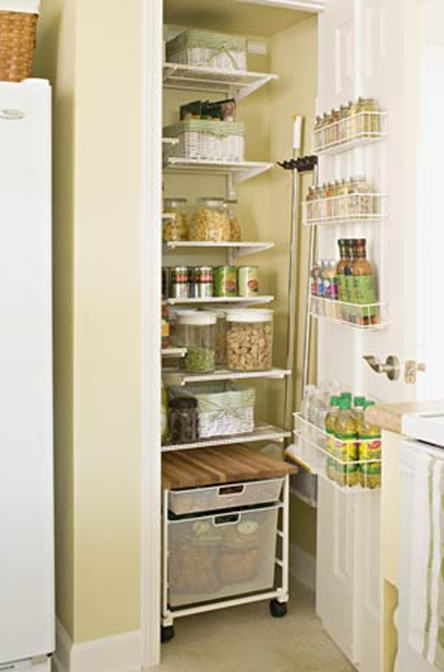
Once you have decluttered your home, the best way to keep it that way is to set up a daily and weekly maintenance sessions. Taking fifteen minutes everyday to tackle the mail, put toys away and organize the entry or mudroom. At least once a month file away papers in your inbox, organize the pantry or review your closet for pieces that could be donated.
Are you ready to conquer the clutter in your home? There is no better time than today.
happy organizing,
cristin
* all photos courtesy of LONNY Magazine
Related Posts Plugin for WordPress, Blogger...
Read full story By on December 27, 2010 in Decluttering, home organization, Organization, organization tips, Organizational tips, Tips/Tricks

Step-by-Step: Preparing Your Home & Family for an Earthquake or Disaster

With September being National Emergency Preparedness Month, I attended a sobering presentation on Earthquake Preparedness by a professional from the USGS. We were told that there is a 62 percent probability for one or more magnitude 6.7 or greater earthquake will strike the San Francisco Bay Area region from now to 2032. (yikes!) It is also reported that only half of people have readiness items set aside in their homes for use in disasters.
But, of course it is not just the people in earthquake country that should be getting their home and family ready in case of an emergency. As we have seen from recent disasters around the world, being unprepared can be devastating. Many put off creating an emergency plan because it seems like such a time intensive and expensive project. The emergency plan checklist by Buttoned Up breaks it down into smaller tasks that can be accomplished in 20-30 minutes increments (download free here). Using the emergency plan checklist as a guide, below are helpful tips and links to preparing for a catastrophe:

One: Organize Your Emergency Plan

Your family may not be together when a disaster occurs, therefore it’s essential to plan in advance how you will communicate and get back together in different scenarios. 
  • Establish a contact. Because it may be easier to make an out-of-town call, identify a contact {ideally out-of-state} your family can call and who can also relay information.
  • Make a contact list. Provide a list of contact phone numbers to all members of your family. For cell phone users, program that person(s) as “ICE” (In Case of Emergency) in your phone. If you are in an accident, emergency personnel will often check your ICE listings in order to get a hold of someone you know. Also, make sure to let your family and friends know that you’ve listed them as emergency contacts. 
  • Subscribe to alert services. Many communities have systems that will send instant text alerts or emails to let you know about such things as bad weather, road closings and local emergencies. To sign up, visit your local Office of Emergency Management website.
  • Establish a meeting place. Select two meeting places in the case your family is separated in an emergency. The first location should be near your home. The second should be out-of-state or further away. Also, review possible evacuation routes available in your area online.
  • Learn about school and work plans. Find out what emergency plans are in place for your work and child’s school.
  • Share the plan. Distribute basic emergency information with your family, friends and neighbors. It should include your contact information, emergency contact, out-of-town contact and your neighborhood meeting place.
  • Prepare Your Home. Identify items in your home that need to be secured in the case of an earthquake. For complete information on making your home safer visit FEMA.

Two: Document Your Valuables

To be reimbursed after a catastrophe need a list of the items in your home. Recording with a video or camera the items you would want replaced is a great option. Also, documenting room to room all valuables {artwork, electronics, jewelry, rugs, furniture, clothing, etc.}.  To make the task a little easier, Buttoned Up has created a binder, Valuables.doc that breaks down the big job of making an inventory into eight smaller steps.
The next step is to store the video, photos or list safely with your attorney, accountant or family member.


Three: Get Your Records Ready

One way to organize for an emergency is to create a binder. The binder holds the most critical information for your home and family, so you’re never without it when you really need it. It should be kept in a safe, yet handy place. Assuming you have a computer and printer, creating the binder is a fairly easy DIY project – here’s how step-by-step

Four: Prepare Your Emergency Kit

Ready America, recommends the following items be included in a Basic Emergency Supply Kit:
  • Water, one gallon of water per person per day for at least three days, for drinking and sanitation
  • Food, at least a three-day supply of non-perishable food {canned & packaged foods – include cooking utensils}
  • Battery-powered or hand crank radio and a NOAA Weather Radio with tone alert and extra batteries for both – this one includes a flashlight!
  • Flashlight and extra batteries
  • First aid kit
  • Whistle to signal for help
  • Dust mask, to help filter contaminated air and plastic sheeting and duct tape to shelter-in-place
  • Moist towelettes, garbage bags and plastic ties for personal sanitation
  • Wrench or pliers to turn off utilities
  • Manual can opener for food (if kit contains canned food)
  • Local maps
  • Cell phone with chargers, inverter or solar charger
This is a list of additional items to strongly consider adding to an Emergency Supply Kit:
  • Prescription medications and glasses.
  • Infant formula and diapers.
  • Pet food and extra water for your pet.
  • Important family documents such as copies of insurance policies, identification and bank account records in a waterproof, portable container.
  • Cash or traveler’s checks and change.
  • Important family documents such as copies of insurance policies, identification and bank account records in a waterproof, portable container. You can use the EFFAK Emergency Financial First Aid Kit – PDF, 277Kb) developed by Operation Hope, FEMA and Citizen Corps to help you organize your information.
  • Emergency reference material such as a first aid book or information from www.ready.gov
  • Sleeping bag or warm blanket for each person. Consider additional bedding if you live in a cold-weather climate.
  • Complete change of clothing including a long sleeved shirt, long pants and sturdy shoes. Consider additional clothing if you live in a cold-weather climate.
  • Household chlorine bleach and medicine dropper – When diluted nine parts water to one part bleach, bleach can be used as a disinfectant. Or in an emergency, you can use it to treat water by using 16 drops of regular household liquid bleach per gallon of water. Do not use scented, color safe or bleaches with added cleaners.
  • Fire Extinguisher {get training from your local fire department on how to properly use a fire extinguisher}.
  • Matches in a waterproof container.
  • Feminine supplies and personal hygiene items.
  • Mess kits, paper cups, plates and plastic utensils, paper towels.
  • Paper and pencil.
  • Comfort items such as books, games, puzzles or other activities for children.
For those in earthquake country, have each member of the family keep sturdy shoes, whistle and a working flashlight next to each bed. The shoes will protect feet in the case of broken glass. Also teach everyone in your household to use  the whistle or knock three times repeatedly if trapped.

Also, find out how to keep food safe during and after and emergency by visiting here.

Five: Discuss Your Plan With Your Family

Set a time to meet with all members of your immediate family and those that live with you to discuss your emergency plan together. Let all know where to find the emergency kit(s), locate important information and who has the documentation for household valuables.
 
Is your family ready for a catastrophe? If not don’t delay in preparing. Planning for a disaster sounds depressing, but when complete will reduce any anxiety or worry you may be feeling.
Plan ahead and be safe!
Related Posts Plugin for WordPress, Blogger...
Read full story By on September 14, 2010 in disaster preparedness, emergency preparedness, home organization, Organization, organization tips, Organizational tips, Tips/Tricks

Organizing the Kitchen Pantry in 5 Simple Steps

Is your pantry an eyesore? Are you buying duplicate food items because you don’t know what’s inside? Has your pantry had any unwanted visitors lately {i.e. ants}?

photo source: BHG KitchenBathIdeas

If you answered yes to any of the questions above, it is time to organize your kitchen pantry. Does this seem like a daunting task? If so, here are five steps to help you organize your pantry with beauty and function:

photo source: BHG KitchenBathIdeas

First – Clear, Discard & Sort
Remove all the items from the pantry and place into boxes based product similarity (i.e. cereals, snacks, canned soups, pasta, baking products, etc.). In the process, check expiration dates and throw away products that have expired {recycle the container / packaging if possible}.

photo source: Martha Stewart

Second – Clean
Clean the pantry shelves and floor with a damp towel.

photo source: La Dolce Vita

Third – Assess
Determine the group of items {cereals} that you use most frequently. With a post-it-note mark that box number one. Proceed to number all boxes from most frequently accessed to least. Also make notes on items that are out-of-stock and need to be replenished.

photo source

Fourth – Make it Pretty
Use decorative storage containers to hold certain items {i.e. tea, rice, flour } and to help you maintain a clutter-free pantry. I particularly like baskets, tins and jars to hide unsightly items. If you opt for plastic, buy BPA (Bisphenol) free containers. BPA is a chemical in many polycarbonate plastics that may breakdown and add harmful chemicals to food. Avoid types 3 and 7 plastics because they may contain BPA.

There are so many adorable ways to label the container like the DIY glass-etched storage jars above from Martha Stewart. It’s also important to determine the type and size of container needed before beginning this project.

photo source: Country Living
Fifth – Arrange
Ideally your most used items should be placed at eye-level {except for heavy items such as large water bottles which would need to be at the floor level}. Again use post–it-notes to number / categorize which shelve each group of items will be housed. Fill the shelves on the appropriate shelf. If you are running out of space, consider storing non-essential items in the garage or basement.

Have you organized your pantry? If so, what tips do you have for keeping your pantry organized?

Related Posts Plugin for WordPress, Blogger...
Read full story By on February 10, 2010 in home organization, household cleaning, kitchens, organization tips, Organizational tips, pantry, storage, Tips/Tricks

Organizing – 5 Gift Wrap Storage Solutions

Keeping gift wrap supplies neatly organized is a year-around task, but during the holiday season it can get out of control. Here are five different gift wrap storage solutions designed to help you organize all those pretty tags, papers and ribbons.

1. The Wall-Mounted Craft Organizer from Pottery Barn is one of my favorite. This space saver is designed so you have all your gift wrap supplies in easy reach.

2. Ballard Designs’ Wrapping Cart is very comprehensive. I love how it has hidden casters and can be rolled away when not in use. Thanks to Deliciously Organized for pointing this one out!

3. Organize.com’s Underbed Storage Chest for gift wrap is an affordable solution for those with limited storage options. Having a pair of these storage chest would be ideal – one for everyday gift wrap needs and one designated for the holidays. And of course this storage solution doesn’t have to go under your bed – it is also suitable for the closet, garage or attic.

4. Another affordable and space saving gift wrap solution is the Hanging Gift Wrap Organizer from the Container Store. Perfect to hang in a closet or on a door or wall hook.

5. For those of you with very limited storage space, a series of stacking vintage suitcase would cleverly store gift wrap. Thank you Apartment Therapy for this fun idea!

Which solution is right for you and your space?

Related Posts Plugin for WordPress, Blogger...
Read full story By on November 24, 2009 in Birthdays, Christmas, home organization, organization tips, Organizational tips